
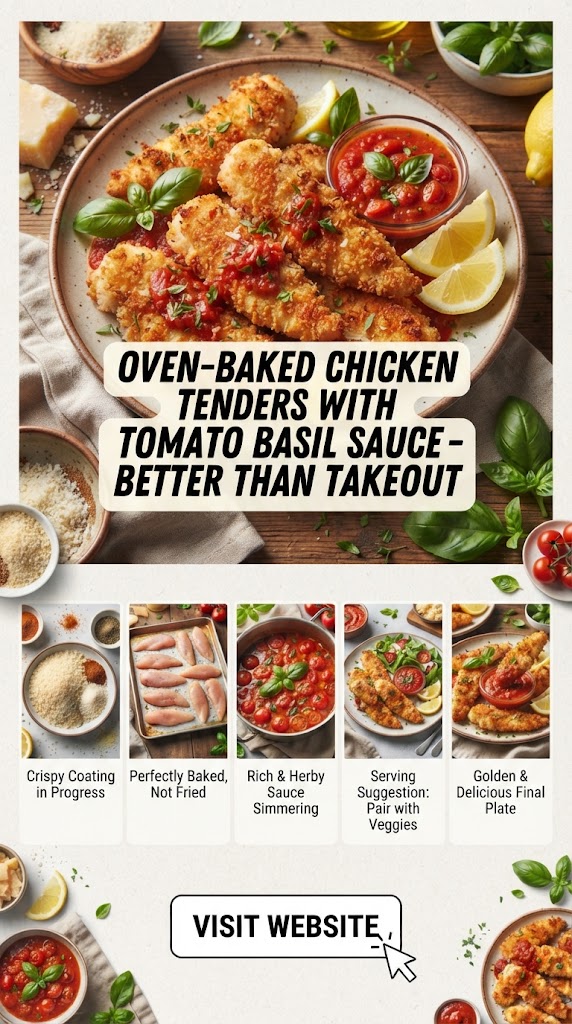
When it comes to comfort food that appeals to every generation, few dishes hold as much weight as chicken tenders. Whether you are five or fifty-five, the combination of a crunchy exterior and a juicy, tender interior is a universal language of culinary satisfaction. However, the standard takeout version often comes with a side of guilt—dripping in industrial seed oils, loaded with excessive sodium, and breaded in mystery flour that loses its crunch before you even get home.
Enter the Oven-Baked Chicken Tenders with Tomato Basil Sauce. This isn’t just a healthy alternative; it is a culinary upgrade. By utilizing smart techniques like pre-toasting breadcrumbs and high-heat roasting, you can achieve a “fried” texture that rivals any deep fryer. Paired with a sophisticated, zesty, and aromatic homemade tomato basil sauce, this meal transforms a childhood staple into a gourmet weeknight dinner.
Why Oven-Baked is the New Gold Standard
The transition from deep-frying to oven-baking is often met with skepticism. People fear dry meat and soggy breading. But the science of the oven has evolved. Modern baking techniques focus on airflow and moisture retention, allowing you to achieve that “shatter-crunch” without the heavy grease.
The Health Benefit: Beyond the Calories
Choosing to bake your chicken tenders isn’t just about cutting calories—though it does that significantly. It’s about the quality of the fats you consume. Deep-fried takeout is usually cooked in oils that have been heated and cooled repeatedly, leading to oxidation. When you bake at home, you control the quality of the oil, opting for high-smoke-point heart-healthy options like avocado oil or high-quality olive oil.
The Flavor Benefit: Enhanced Seasoning
In a deep fryer, much of the seasoning in the breading can wash off into the oil. In the oven, the seasoning stays exactly where you put it. This allows for a more nuanced flavor profile, where herbs like oregano, garlic powder, and smoked paprika can truly shine and form a crust that is as flavorful as it is textured.
The Secret to the Ultimate Crunch: Panko and Pre-Toasting
If you want your chicken tenders to be “Better Than Takeout,” you cannot use standard breadcrumbs alone. The secret lies in Panko.
Panko breadcrumbs are Japanese-style breadcrumbs made from crustless bread. They are larger, airier, and more jagged than traditional crumbs. Because they are so light, they don’t soak up grease, and they provide a much louder “crunch.”
The “Pro” Tip: Pre-Toast Your Crumbs
Oven-baked chicken often looks pale. To fix this, you must toast your Panko breadcrumbs in a pan with a drizzle of olive oil before you even touch the chicken. This ensures that the tenders emerge from the oven a deep, golden mahogany, looking exactly like they just came out of a professional kitchen.
Ingredients You’ll Need
To create this masterpiece, you need high-quality, fresh ingredients. Here is the breakdown for both the chicken and the signature sauce.
For the Chicken Tenders:
- Chicken Breast or Tenderloins: 1.5 lbs. If using breasts, slice them into even 1-inch strips.
- Panko Breadcrumbs: 2 cups (unseasoned is best so you can control the salt).
- Parmesan Cheese: ½ cup, finely grated (this adds a salty, nutty depth).
- Flour: ½ cup (All-purpose or a gluten-free blend).
- Eggs: 2 large, beaten (the “glue” that holds it all together).
- Spices: Garlic powder, onion powder, smoked paprika, dried oregano, kosher salt, and freshly cracked black pepper.
- Olive Oil Spray: To help the crust crisp up.
For the Tomato Basil Sauce:
- San Marzano Tomatoes: 1 can (28 oz), crushed by hand or pulsed in a blender.
- Fresh Basil: A large handful, torn.
- Garlic: 4 cloves, minced.
- Shallot: 1 small, finely diced.
- Red Pepper Flakes: A pinch for a subtle kick.
- Balsamic Vinegar: 1 tablespoon (the secret to balancing the acidity).
- Extra Virgin Olive Oil: 3 tablespoons.
Step-by-Step Guide: Making the Tenders
1. Preparing the Chicken
Start by patting the chicken completely dry with paper towels. This is a non-negotiable step. If the chicken is wet, the flour will turn into a paste, and the breading will slide right off. Season the raw meat lightly with salt and pepper before you begin the dredging process.
2. The Toasting Phase
In a large skillet over medium heat, add two tablespoons of olive oil and your Panko breadcrumbs. Stir constantly for 3-5 minutes until the crumbs turn a beautiful light golden brown. Remove from heat and transfer to a shallow bowl. Once cooled slightly, mix in the grated Parmesan and your dried spices.
3. The Dredging Station
Set up three bowls in an assembly line:
- Bowl 1: Flour seasoned with a pinch of salt.
- Bowl 2: Beaten eggs with a teaspoon of water or Dijon mustard for extra tang.
- Bowl 3: Your pre-toasted Panko-Parmesan mixture.
4. Bread the Chicken
Using the “wet hand, dry hand” method to avoid coating your fingers, dip a chicken strip into the flour (shake off excess), then the egg (let the excess drip off), and finally press it firmly into the Panko mixture. Ensure every nook and cranny is covered.
5. The Baking Process
Preheat your oven to 425°F (220°C). Place a wire cooling rack on top of a large baking sheet. This allows hot air to circulate under the chicken, ensuring the bottom is just as crunchy as the top.
Arrange the tenders on the rack and give them a final light spritz of olive oil spray. Bake for 15-18 minutes (depending on thickness) until the internal temperature reaches 165°F.
Crafting the Signature Tomato Basil Sauce
While the chicken is baking, it’s time to focus on the sauce. This isn’t just a dipping sauce; it’s a vibrant, herbaceous accompaniment that cuts through the richness of the breading.
1. Sauté the Aromatics
In a saucepan over medium heat, add the olive oil. Sauté the shallots until translucent, then add the minced garlic and red pepper flakes. Cook for just 60 seconds until fragrant—do not let the garlic burn, or it will turn bitter.
2. Simmer the Tomatoes
Add the crushed San Marzano tomatoes. These are preferred because they are sweeter and less acidic than standard canned tomatoes. Stir in the balsamic vinegar and a pinch of salt. Let the sauce simmer on low for about 10-12 minutes, allowing the flavors to meld and the sauce to thicken slightly.
3. The Final Touch: Fresh Basil
Never cook the basil for a long time. It loses its bright, peppery flavor when overheated. Once the sauce is removed from the heat, stir in the torn fresh basil leaves. The residual heat will wilt them and release their essential oils into the sauce.
The Science of Flavor: Why This Pairing Works
The reason this dish tastes “better than takeout” is due to the balance of the five basic tastes:
- Salty: From the Parmesan and the seasoned breading.
- Sweet: From the natural sugars in the San Marzano tomatoes and the balsamic reduction.
- Sour/Acidic: From the tomatoes and vinegar, which “cleans” the palate after the richness of the chicken.
- Umami: Found in the chicken itself and the aged Parmesan cheese.
- Bitter/Pungent: From the fresh basil and garlic.
When you dip a salty, crunchy tender into a sweet and acidic sauce, your taste buds experience a “flavor bounce” that keeps the meal exciting from the first bite to the last.
Common Mistakes to Avoid
To ensure your Oven-Baked Chicken Tenders are a success every single time, avoid these common pitfalls:
- Overcrowding the Pan: If the chicken pieces are touching, they will steam instead of roast. This leads to a soggy crust. Give them at least an inch of space.
- Skipping the Wire Rack: If you bake directly on a sheet pan or parchment paper, the side touching the pan will get wet from the chicken’s juices. Use a rack!
- Using Cold Chicken: Try to let your chicken sit at room temperature for about 15 minutes before baking. This ensures even cooking.
- Overcooking: Chicken breast dries out rapidly once it passes 165°F. Use an instant-read thermometer to pull them out at the perfect moment.
Nutritional Comparison: Homemade vs. Takeout
| Feature | Typical Takeout (3 Tenders) | This Homemade Recipe |
|---|---|---|
| Calories | 600 – 800 | 350 – 400 |
| Total Fat | 40g | 12g |
| Sodium | 1200mg+ | 450mg |
| Ingredients | Preservatives, MSG, Seed Oils | Fresh Whole Foods |
As the table shows, making this at home allows you to enjoy a massive portion for half the caloric “cost,” while significantly reducing inflammatory fats and sodium levels.
Serving Suggestions
How you plate this dish can elevate it from a simple snack to a full-course dinner.
- The Family Style Platter: Place the golden tenders on a large wooden board with the tomato basil sauce in a central bowl. Garnish with extra basil leaves and a sprinkle of Parmesan.
- The Chicken Parm Twist: Place the cooked tenders in a baking dish, spoon the sauce over the center, top with a slice of fresh mozzarella, and broil for 2 minutes until bubbly.
- The Healthy Power Bowl: Serve the tenders over a bed of arugula or baby spinach with a side of roasted zucchini and the sauce used as a dressing.
Storage and Reheating Tips
If you have leftovers (which is rare!), you want to preserve that crunch.
- Storage: Keep in an airtight container in the fridge for up to 3 days.
- The Golden Rule of Reheating: Never use the microwave. A microwave will turn the breading into a sponge. Instead, use an air fryer at 350°F for 3-4 minutes or a toaster oven for 5-7 minutes. This reactivates the oils in the breading and restores the original crunch.
Frequently Asked Questions (FAQ)
Can I make this recipe gluten-free?
Absolutely. Substitute the all-purpose flour with almond flour or a 1:1 gluten-free baking flour. For the breading, look for “Gluten-Free Panko” which is now widely available in most US grocery stores.
Can I use an Air Fryer?
Yes! The air fryer is essentially a high-powered convection oven. Cook the tenders at 375°F for 10-12 minutes, flipping halfway through. You may need to work in batches to avoid overcrowding.
What if I don’t have San Marzano tomatoes?
You can use standard canned crushed tomatoes, but you may need to add a half-teaspoon of sugar to mimic the natural sweetness of the San Marzano variety.
How do I make the chicken even more tender?
If you have time, soak the chicken strips in buttermilk for 30 minutes before breading. The lactic acid in the buttermilk breaks down the proteins, resulting in an exceptionally tender bite. Just be sure to let the excess buttermilk drip off before starting the flour dredge.
Final Thoughts: The Joy of Home Cooking
Mastering the Oven-Baked Chicken Tender is a rite of passage for the home cook. It proves that you don’t need a deep fryer to create something indulgent and satisfying. When you take that first bite—the sound of the Panko crunching, followed by the burst of herbaceous tomato sauce—you’ll realize that the “Better Than Takeout” claim isn’t just marketing. It’s a culinary reality.
This recipe is more than just a meal; it’s an opportunity to gather friends and family around a table for a dish that everyone loves, knowing exactly what went into it. It’s clean, it’s vibrant, and most importantly, it’s delicious. So skip the delivery app tonight, preheat your oven, and prepare for a chicken tender experience that will redefine your weeknight routine.