Nashville Hot Chicken is more than just a meal; it is a cultural phenomenon that has migrated from the heart of Tennessee to dinner tables across the globe. Traditionally, this dish involves deep-frying chicken in vats of lard and drenching it in a fiery, cayenne-heavy oil. However, as our focus shifts toward healthier cooking methods without sacrificing flavor, the air fryer has emerged as the hero of the modern kitchen.
In this comprehensive guide, we will explore how to create the ultimate Air Fryer Nashville Hot Chicken Tenders dinner. We will dive into the science of the perfect crunch, the history of the “burn,” and the essential side dishes that turn a few tenders into a legendary feast.
The History and Heart of Nashville Hot Chicken
Before we preheat our air fryers, it is essential to understand the roots of what we are cooking. Nashville Hot Chicken originated in the African American community of Nashville, Tennessee. The most famous story involves Thornton Prince, a man known for his wandering eye. As the legend goes, his partner, frustrated by his late-night antics, decided to punish him by dousing his favorite fried chicken in an excessive amount of pepper and spice.
The plan backfired. Prince loved the spicy chicken so much that he opened the BBQ Chicken Shack, which later became the world-renowned Prince’s Hot Chicken Shack. Today, the dish is a staple of Southern cuisine, characterized by its deep red hue, intense heat, and the iconic serving style: atop a slice of white bread with dill pickles.
Why the Air Fryer is Perfect for Nashville Hot Chicken
Deep frying is undeniably delicious, but it comes with drawbacks: heavy oil splatter, high calorie counts, and the lingering smell of grease in your home. The air fryer solves these issues through rapid air technology.
1. The Science of the Crunch
An air fryer is essentially a compact convection oven. It circulates hot air around the chicken at high speeds, which triggers the Maillard reaction—a chemical reaction between amino acids and reducing sugars that gives browned food its distinctive flavor and texture. Because chicken tenders are smaller and thinner than bone-in pieces, they are the perfect candidates for air frying, reaching maximum crispiness in a fraction of the time.
2. Healthier Without Compromising Flavor
By using an air fryer, you reduce the fat content by up to 75-80%. While Nashville Hot Chicken traditionally uses oil in the glaze, you have more control over the quantity when air frying the chicken first, allowing you to enjoy the heat without feeling weighed down.
Ingredients Breakdown: What You’ll Need
To achieve restaurant-quality results, the quality of your ingredients matters. This recipe is divided into three parts: the marinade/brine, the breading, and the signature hot oil glaze.
The Chicken
- 1.5 lbs Chicken Tenders: Look for high-quality, organic chicken if possible. You can also use chicken breasts cut into 1-inch strips.
- Buttermilk (2 cups): The acidity in buttermilk tenderizes the meat by breaking down protein fibers.
- Hot Sauce (2 tbsp): Use a vinegar-based sauce like Frank’s RedHot or Texas Pete in the brine to start building layers of flavor.
- Pickle Juice (2 tbsp): A secret weapon for adding tang and moisture.
The Breading (The “Crunch” Factor)
- All-Purpose Flour (1.5 cups): The base of your crust.
- Cornstarch (1/2 cup): This is the secret to a “shatter-crisp” texture. Cornstarch prevents gluten development and keeps the coating light.
- Seasonings: 1 tsp salt, 1 tsp black pepper, 1 tsp garlic powder, and 1 tsp onion powder.
The Nashville Hot Glaze
- Neutral Oil or Melted Butter (1/3 cup): Use avocado oil or melted unsalted butter.
- Cayenne Pepper (2-4 tbsp): Depending on your heat tolerance. Two tablespoons is “Medium,” while four is “Nashville Inferno.”
- Brown Sugar (1 tbsp): To balance the heat with a hint of caramel sweetness.
- Smoked Paprika (1 tsp): For color and a deep, smoky undertone.
- Chili Powder (1/2 tsp): For complexity.
Step-by-Step Instructions for Perfect Tenders
Step 1: The Brining Phase
Place your chicken tenders in a large bowl or a zip-top bag. Pour in the buttermilk, hot sauce, and pickle juice. Submerge the chicken fully and refrigerate for at least 30 minutes, though 2 to 4 hours is ideal. This step ensures your tenders stay juicy inside even as the outside becomes incredibly crisp.
Step 2: The Double-Dredge Technique
For that authentic craggy, “extra crispy” look, we use a double-dredge method.
- In a shallow dish, whisk together the flour, cornstarch, and spices.
- Take a tender from the buttermilk, let the excess drip off, and coat it in the flour mixture.
- Dip it back into the buttermilk briefly.
- Press it back into the flour mixture, ensuring every nook and cranny is covered.
- Place the breaded tenders on a wire rack and let them rest for 10 minutes. This “sets” the breading so it doesn’t fall off in the air fryer.
Step 3: Air Frying
- Preheat your air fryer to 375°F (190°C) for 5 minutes.
- Lightly spray the air fryer basket with a high-smoke-point oil (like avocado or canola spray).
- Place the tenders in a single layer. Do not crowd the basket. If they touch, they will steam instead of fry.
- Spray the tops of the chicken generously with oil. If you see any white flour spots, hit them with a bit more spray.
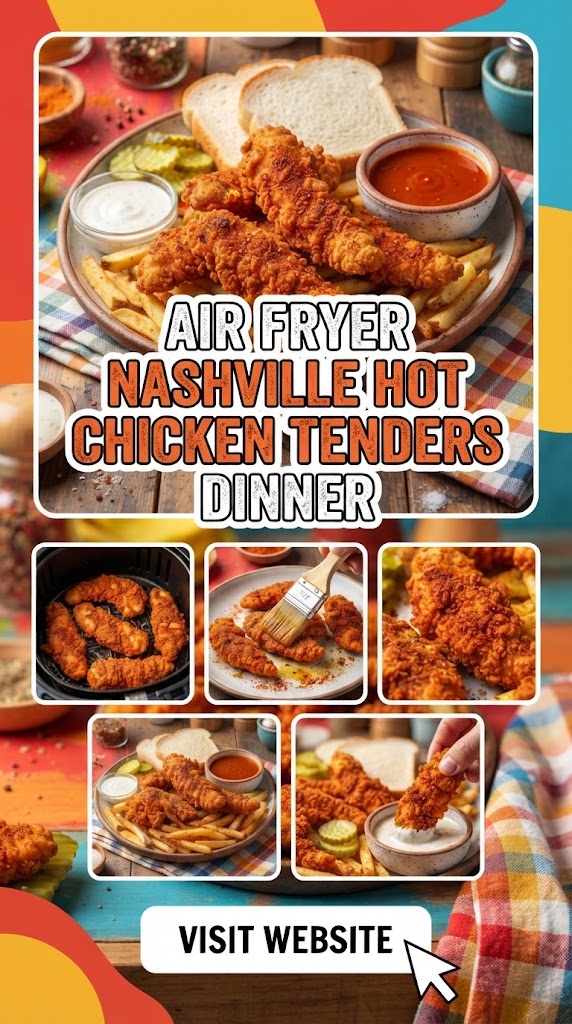
- Cook for 12-15 minutes, flipping halfway through. The internal temperature should reach 165°F (74°C).
Step 4: Making the “Hot Oil”
While the chicken is cooking, whisk together your glaze ingredients in a small bowl. If using butter, ensure it is melted and warm. The oil/butter carries the spices into the cracks of the breading, creating that signature wet-look finish.
Step 5: The Finishing Touch
As soon as the chicken comes out of the air fryer, use a pastry brush to coat each tender with the hot oil glaze. Alternatively, you can toss them in a bowl with the sauce, but brushing preserves the crunch better.
Elevating the Meal: The Ultimate Side Dishes
A Nashville Hot Chicken dinner is incomplete without the proper accompaniments to balance the heat.
1. The Foundation: White Bread and Pickles
Traditionally, these tenders are served on slices of cheap, soft white bread. The bread serves a purpose: it soaks up the spicy oil that drips off the chicken, becoming a delicious treat at the end of the meal. Top the chicken with thick-cut dill pickle chips to provide a vinegary crunch that cuts through the spice.
2. Creamy Coleslaw
A cool, mayonnaise-based slaw is the perfect foil for cayenne pepper.
- Pro Tip: Add a dash of apple cider vinegar and a pinch of celery seed to your slaw for an authentic Southern flavor profile.
3. Macaroni and Cheese
If you want a hearty dinner, creamy mac and cheese is the go-to. The dairy in the cheese contains casein, which helps neutralize the capsaicin in the peppers, allowing you to eat more chicken without the “burn” becoming overwhelming.
4. Seasoned Fries or Potato Salad
Whether you prefer crispy air-fried waffle fries or a mustard-based potato salad, starch is a necessary component to round out the plate.
Pro Tips for Air Fryer Success
- The “Flour Spot” Rule: If your chicken comes out with white, dry flour patches, it means you didn’t use enough oil spray. Don’t be afraid to mist the chicken; it’s still significantly less oil than deep frying.
- Room Temperature Chicken: Let your marinated chicken sit on the counter for 15 minutes before air frying. Cold chicken can cause the temperature of the air fryer to drop, leading to uneven cooking.
- Keep it Warm: If you are cooking in batches, place the finished tenders on a wire rack in a 200°F oven to keep them crispy while the rest cook.
- The Spice Control: If you are cooking for a family with varying heat tolerances, leave the glaze on the side. Let everyone brush on their own level of “hot.”
Adjusting for Dietary Needs
- Gluten-Free: Swap the all-purpose flour for a 1:1 gluten-free flour blend. Ensure your cornstarch is certified GF. Use GF bread for serving.
- Keto/Low Carb: Use crushed pork rinds (pork panko) and parmesan cheese instead of flour and cornstarch. Use a sugar-free sweetener instead of brown sugar in the glaze.
- Dairy-Free: Substitute buttermilk with almond or soy milk mixed with 1 tablespoon of lemon juice. Use vegan butter or oil for the glaze.
Storage and Reheating Instructions
One of the best things about the air fryer is how well it reheats leftovers.
- Storage: Store leftover tenders in an airtight container in the refrigerator for up to 3 days.
- Reheating: Do not use the microwave! It will make the breading soggy. Instead, place the tenders back in the air fryer at 350°F for 3-5 minutes. They will regain almost all of their original crunch.
Why This Recipe Works for Busy Families
Dinner time is often a rush. This recipe, while appearing complex, is highly efficient. The marinating can happen while you are at work or running errands. The actual cooking time is under 15 minutes. It’s a way to bring a “destination meal” into your home without the cost of a plane ticket to Nashville or the price tag of a trendy local bistro.
The Air Fryer Nashville Hot Chicken Tenders dinner is a masterclass in texture and flavor. It hits every taste bud: salty, sweet, spicy, and tangy. By following this guide, you aren’t just making dinner; you are recreating a piece of culinary history with a modern, healthy twist.
Summary Checklist for Success:
- Marinate in buttermilk for tenderness.
- Cornstarch in the flour for crunch.
- Don’t Overcrowd the basket for even airflow.
- Spray Thoroughly to avoid dry flour spots.
- Brush the Glaze while the chicken is piping hot.
- Serve with Pickles to balance the heat.
Enjoy the bold, fiery, and undeniably satisfying experience of Nashville Hot Chicken, right from your air fryer!